How to Calculate δ Ferrite Content in Stainless Steel?
To calculate the δ (delta) ferrite content in stainless steel, you can follow these steps:
- Obtain a representative sample of the stainless steel material.
- Prepare the sample by grinding, polishing, or etching to expose the microstructure.
- Use a microscope capable of measuring ferrite content or employ image analysis software to analyze the microstructure.
- Capture an image of the microstructure at a suitable magnification.
- Use image analysis software or manual counting to determine the area fraction or volume fraction of δ ferrite within the microstructure. This involves identifying and quantifying the presence of δ ferrite phases.
- Calculate the δ ferrite content as a percentage using the following formula:δ Ferrite Content (%) = (Area or Volume of δ Ferrite / Total Area or Volume) x 100Note: The equation can be adjusted based on whether the measurement is in terms of area fraction or volume fraction.
- Repeat the analysis on multiple areas of the sample to ensure representative results.
Ferrite Percentage to Ferrite Number Calculator
Importance of δ Ferrite in Austenitic & Duplex stainless steel welds
A characteristic of austenitic stainless is their susceptibility to hot-short cracking after being welded. This is also called micro-fissuring. This problem is corrected by using electrodes that deposit weld metal containing a small amount of ferrite.
Due to this most of the electrodes for welding austenitic stainless steel contains 3 to 10% ferrite even though the same steel base material contains no ferrite.
For low-temperature service, the weld metal should have a ferrite content in the range of 4 to 10%. Similarly, ferrite control is very critical in duplex stainless steel weldments. Duplex stainless steel welds & HAZ that have a high amount of ferrite can have low impact toughness, reduced ductility, and reduced corrosion resistance.
Hence, control of ferrite is highly desirable when welding duplex stainless steel.
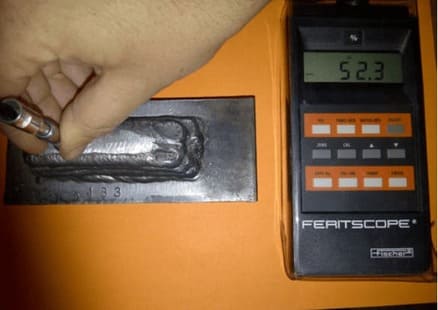
Ferrite Testing, Acceptance Criteria & Conversion Formulas
What is Ferrite Phase in Stainless Steel?
Ferrite is the body-centered cubic (BCC) crystalline phase of iron and other metals. It has a low carbon content and is used in stainless steel to prevent carbide precipitation and sensitization. The word ferrite comes from the Latin word for iron, ferrum.
Stainless steel is an alloy of iron, chromium, nickel, and other metals. The microstructure of stainless steel is the arrangement of these different metals in a crystal lattice. The three main microstructures of stainless steel are austenite, ferrite, and martensite.
Ferrite is the least expensive and most widely used phase of stainless steel. It is non-magnetic and has good ductility and toughness. Ferrite phase is achieved by adding chromium to iron or other ferrite stabilizers.
The amount of carbon in the ferrite phase controls the corrosion resistance. If there is less than 0.03% carbon, the steel will be susceptible to intergranular corrosion.
Ferrite Calculation Methods
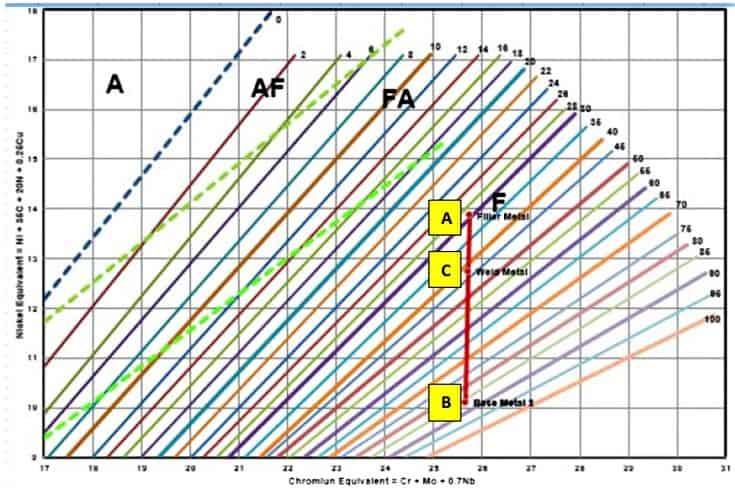
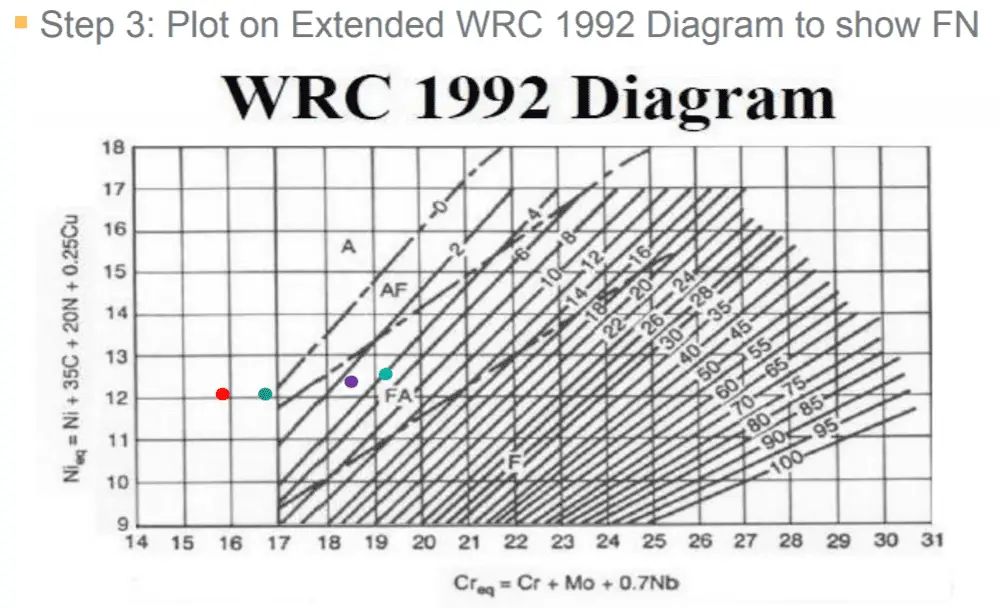
WRC-1992 Phase diagram ((gives ferrite Number) and ESPY diagram (gives ferrite percentage) are can be used to predict the ferrite content of weld deposit using the chemical composition of the welds.
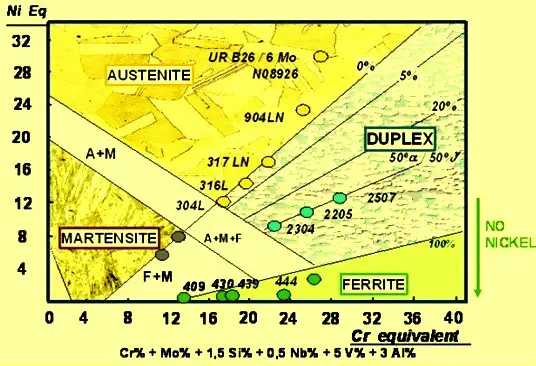
The other phase diagrams such as (SCHAEFFLER or DELONG) which do not count nitrogen and copper amount- can’t be used for duplex stainless-steel weldments.
Ferrite Measurement Methods
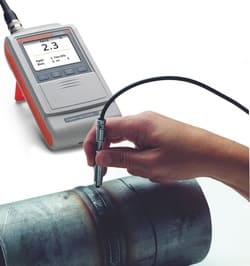
The determination of the ferrite content in austenitic steels can be made either metallographically by using micro-sections, (destructively) or magneto-inductively (nondestructively) such as the ferritscope (results in F% or FN) or magne-gage (results in FN) directly at the weld.
However, in magneto-inductive testing, the reading is a function of the chemical composition of the alloy.
Therefore, when dealing with high ferrite content the indicated ferrite content does not correspond to the actual content in the material, since high-alloyed ferrite tends to have a weaker magnetic reaction than the same ferrite content does with a lower alloy potential.
For these reasons, the Ferrite number (FN) was introduced to indicate the content of ferrite (EN ISO 8249 and EN ISO 17 655). The above Ferrite determination methods can’t be used for localized ferrite measurements. For measuring ferrite in a localized area, the Metallographic grid technique is used.
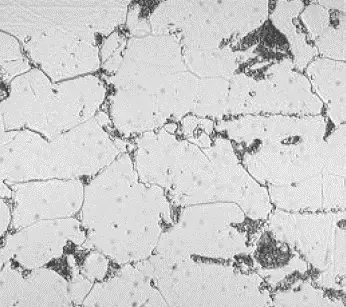
The method is performed according to the ASTM E562 standard at a high magnification level usually more than 400X is used for ferrite measurement.
Magnification plays an important role in ferrite measurement in the grid method as highlighted in the below figure.
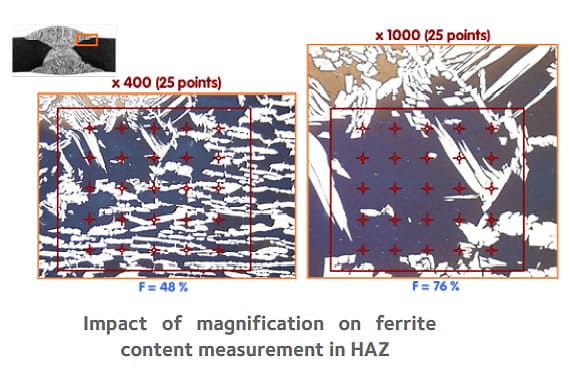
Other Ferrite measurement techniques are also used in the industries. One main type is image analysis ferrite measurements as per ASTM E1245.
Range of Ferrite Content for Duplex Stainless-Steel Welding Qualification
In Duplex stainless steel weldments & heat-affected zone (HAZ), the Ferrite content shall be within the range given below:
- In Weld metal—30% to 65%,
- In Heat affected zone or HAZ—40% to 65%,
- in the Base metal—40% to 60%.
NOTE 1: Ferrite content below 25% can also be accepted for welding where corrosion tests or other related tests can be shown satisfactorily.
Welding carried out using Nickel base consumables does not require ferrite content measurements.
NOTE 2: Use the following formula to convert ferrite % to FN:
- For 22 % Cr duplex stainless steel, ferrite % = 0.7 × FN;
- For 25 % Cr duplex and super duplex stainless steels, ferrite % = 0.65 × FN.
Influence of Elements and Cooling rate on % Ferrite
The influence of alloying elements and cooling rate on ferrite is significant. The addition of alloying elements alters the solubility of carbon in iron and, as a result, the distribution of carbon between ferrite and austenite.
The amount of carbon that can be dissolved in iron at a given temperature is known as the solubility limit. The cooling rate influences the microstructure and properties of ferrite by affecting the rate at which austenite transforms to ferrite.
A slow cooling rate gives ample time for carbon to diffuse out of the solution, resulting in a higher concentration of carbon in ferrite and a lower concentration in austenite. This results in a greater proportion of body-centered cubic (BCC) ferrite than face-centered cubic (FCC) austenite.
This can be classified as below:
- Fast Cooling — High Ferrite
- Slow Cooling — Low Ferrite
Effect of Ferrite & Austenite in Duplex Stainless Steel
Duplex stainless steels are gaining popularity in the industry due to their high strength and corrosion resistance. However, these properties are largely influenced by the microstructure of the material, which is a mixture of ferrite and austenite.
In this article, we will discuss the effect of ferrite and austenite on the properties of duplex stainless steel.
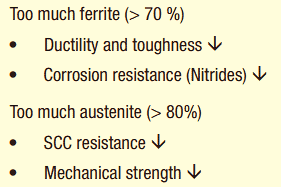
Ferrite is responsible for the high strength of duplex stainless steel. It is harder and stronger than austenite, but it is also more brittle. The presence of ferrite increases the risk of cracking during welding or other thermal processing.
Austenite, on the other hand, contributes to the corrosion resistance of duplex stainless steel. It is more resistant to attack by acids and other chemicals than ferrite.
Metallographic Tests
Metallographic Tests are rarely called for in specifications (e.g., ASME Section VIII or AWS D1.1) but they are commonly used for quality control and during inspection. Metallographic Tests objectives are to determine weld soundness, to examine the extent and distribution of non-metallic inclusions in the weld.
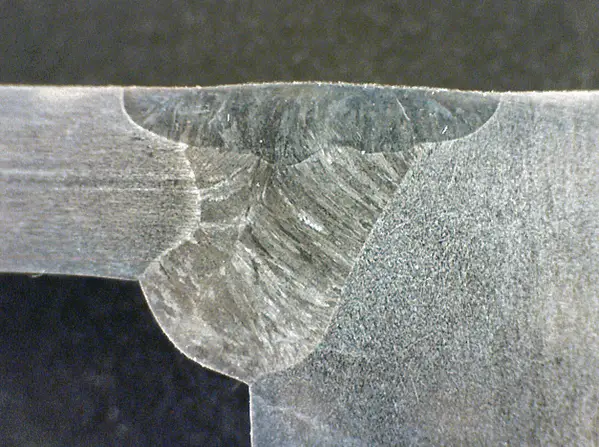
They are beneficial to check the number and arrangement of welding runs, to determine the metallurgical structure in the fusion zone and the heat-affected zone and to check the depth of weld penetration.
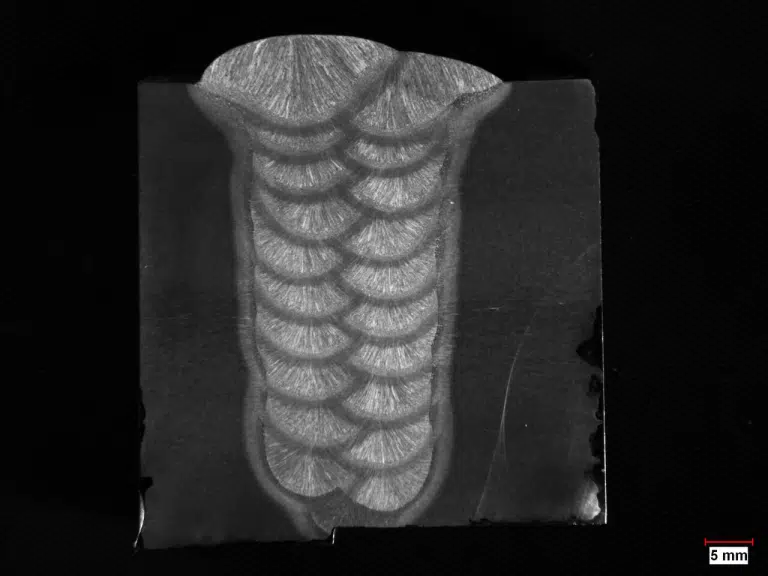
Samples are obtained from a test weld by sectioning or from a production weld by trepanning. Trepanning means mechanical removal of the weld joint portion in one piece with a special tool, which leaves a recess in the joint which can be easily filled up by welding.
From these samples, macro specimens or micro specimens are prepared by suitable etching procedures as follows:
Macro-Specimens in Metallography
If one wants to avoid grinding and polishing of the cross-sectional surface, one can directly place the specimen in boiling 50% solution of hydrochloric acid in water for approximately 30 min.
Alternately, one may first grind and smoothen the surface with emery wheel or emery paper and then vigorously rub the surface with a piece of cotton fully wetted with a solution of one part of solid ammonium persulphate in nine parts of water by weight.
This rubbing action must be repeated until a clearly defined macrostructure appears on the weld. After etching, the specimens are washed thoroughly in clear water and wiped dry. They are then immersed in ethyl alcohol, removed and air dried.
If a specimen is to be preserved, a coat of thin, clear lacquer may be applied, so that the surface does not rust in storage.
Micro-Specimens in Metallography
These specimens have to be prepared with a highly polished mirror-like surface and etched with proper chemicals and techniques depending on the type of alloy and the microstructures one is looking for.
The procedure of sample preparation and examination is complicated and requires suitable equipment and a trained metallographer. Interpretation of the photomicrographs also demands a sound knowledge of physical metallurgy.
