Welding Sequence
Welding sequence is the order in which welding beads are placed in a welding joint and is useful for distortion control. By properly planning the sequence in which various weld passes are made, the welder can reduce or eliminate distortion.
There are many factors to consider when planning a welding sequence, such as the type of metal being welded, the thickness of the metal, the desired final shape of the joint, and any special features that need to be taken into account.
In general, however, there are a few basic principles that should be followed.
Welding Distortion
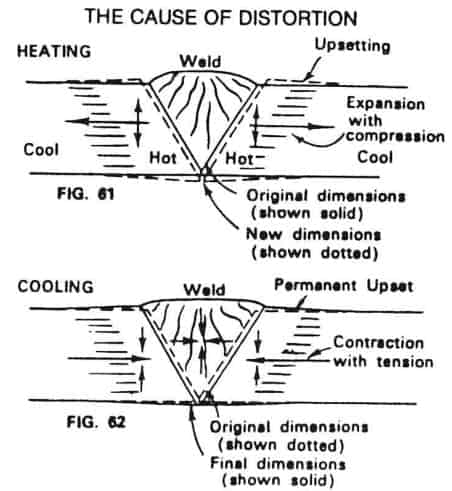
During welding, the weldment and surrounding areas undergo localized heating and cooling cycles; therefore, the temperature distribution in the weldment is not uniform, and structural and metallurgical changes take place as the welding progresses along a joint.
As the weld pool solidifies and shrinks, it begins to exert stress on the surrounding weld metal and heat-affected zones. Depending upon the amount of welding heat input, these stresses can be high enough to cause dimensional changes into the part, known as Welding Distortion.
So, the stresses caused by the welding are the main reason for producing distortion in welding.
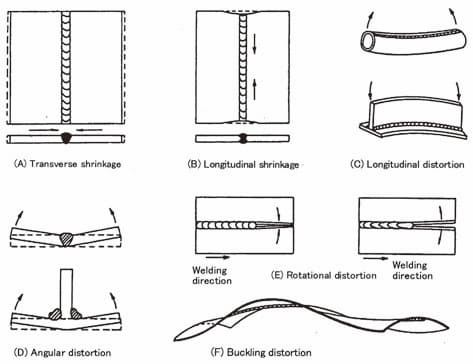
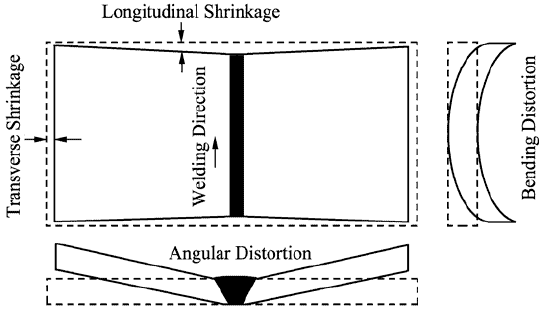
The distortion found in welded parts or structures is mainly caused by three fundamental dimensional changes that occur during welding.
These changes are based on their direction:
- Transverse shrinkage is generated perpendicular to the weld axis,
- longitudinal shrinkage is generated parallel to the weld axis, and
- Angular change causes rotation around the weld axis.
- Bending at various locations.
Welding Sequence to Avoid Distortion
Distortion in some form or another cannot be stopped. Hence, suitable actions must be taken to lessen it.
Distortion can best be controlled by using a well-organized welding sequence. Plan how you place your weld beads, so that effect of welding heat can be balanced to control the distortion.
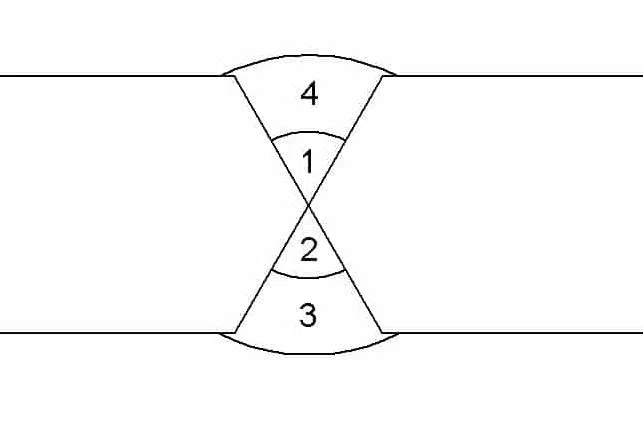
For example- when welding a double V groove by alternate sides to balance the stresses and hence balance the distortion.
See the below example for welding bead placement. The number here represents the welding bead sequence.
How to Prevent Distortion in Welding
Prevention of Distortion in Welding includes controls of welding heat input and the stresses. This can be achieved
Welding involves inducing a lot of heat and local stresses in the component. This is bound to produce dimensional changes by distortion in the part.
The best thing is to control this distortion, its magnitude, and its adverse effects by maximum to have the optimized part dimensions by using distortion control techniques as explained in this post.
Control of distortion includes consideration during the design stage and the selection of the welding and assembly procedures, as well as the use of techniques such as elastic pre-straining and preheating.
How to Control Distortion in Welding?
Welding Distortion Control Methods
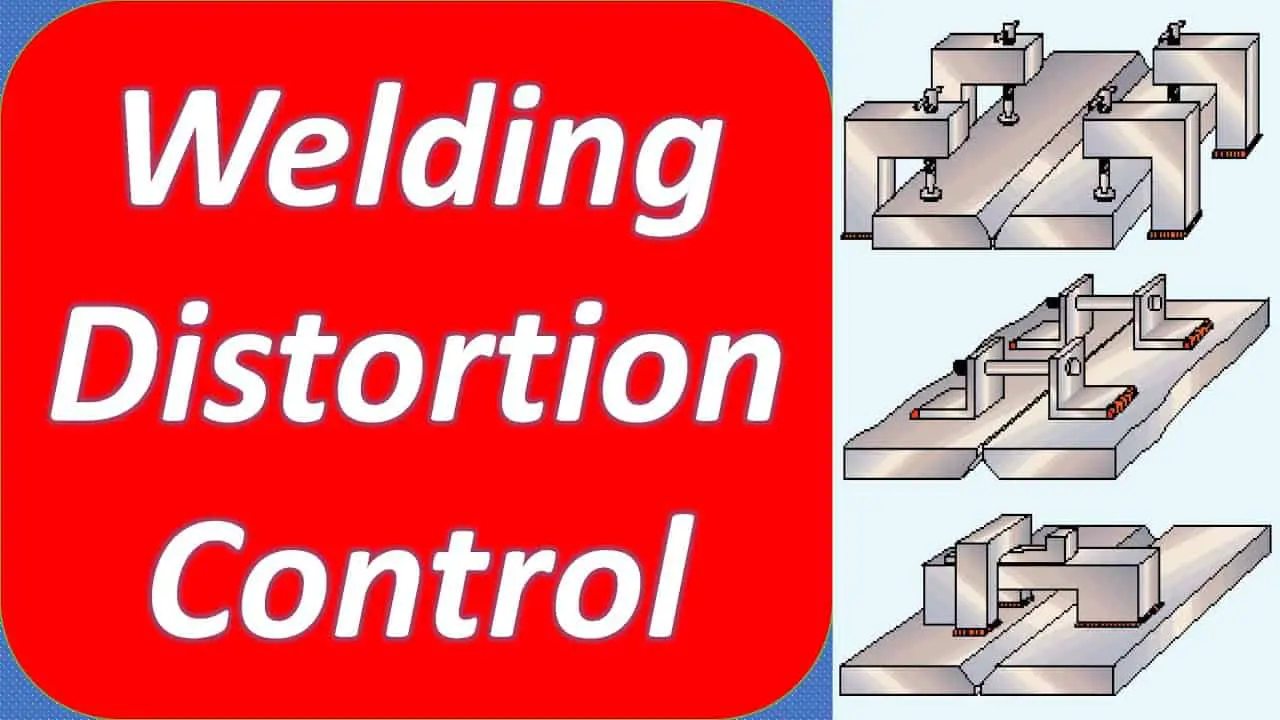
Welding distortion control methods includes the best welding practices, using restrain, applying welding techniques and reducing welding heat input.
The most important welding distortion control methods are listed below:
- Do not over weld: Higher the weld deposit, the higher the shrinkage stresses & weld distortion. Using the correct size of a weld joint reduces distortion as well as reduces the cost of welding filler and time.
- Use staggered welding: Using the staggered/ scattered welds in place of the full weld will reduce the buildup of welding heat and will help to control the weld distortion.
- Use large diameter rods: Weld using larger diameter electrodes instead of welding a lot of passes with the smaller electrodes. But this should not be used in the case of longitudinal & angular distortion-prone areas.
- Apply weld close to the weld central axis
- Use backstep welding technique: The distortion is controlled by applying welds in a controlled manner by a backstep welding method.
- Guess the shrinkage forces: Anticipating the distortion and putting preventive measures can also ensure control of distortion.
- Remove shrinkage forces after welding: Perform peening after welding to reduce the shrinkage stresses which otherwise will cause distortion in the weld joint. Peening minimizes the residual stresses.
- Reduce weld time: Lower the welding time means lower the amount of heat in the welding assembly. So, by welding fast beads instead of welding slow weld passes, will going to result in lesser distortion due to less heat into the weldment and the part to be welded.
Types of welding Sequences
Welding Sequence or Welding Technique: Welding Sequence is the order of making the welds in a weldment.
If we talk about welding techniques, Welding Technique is the details of a welding operation that the welder performs as per the pre-planned sequence for the weld bead placements. The objective of a welding sequence is to control distortion mainly.
Distortion in welding can be easily controlled by using the right approach involving weld bead placements or also called welding sequence.
Different types of welding sequences have been developed around the world are mainly- backstep, block, build-up, and cascade sequences, for example, are used to control welding distortion and reduce residual stresses in welding.
Choosing the best-known sequence based on the job requirements is very important for effective results.
Backstep Welding Sequence
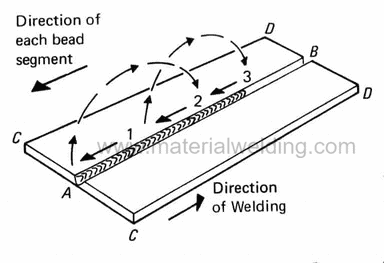
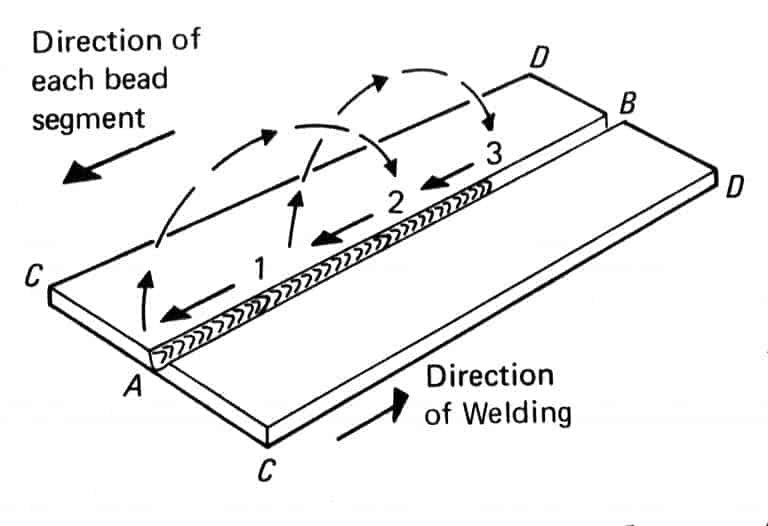
The backstep welding sequence is a longitudinal welding sequence in which welding passes are welded in the opposite directions of weld progression as shown in the below sketch.
As you can observe in the below sketch, weld bead 2 is placed after weld bead 1, and weld bead 3 is placed after weld bead 2. By this sequence, the heat accumulation due to the welding direction is controlled.
In usual welding practice, we weld from one direction to another, leaving behind the stresses accumulation only in one direction.
With backstep welding, we can control the welding heat input and resultant weld stresses that cause the distortion.
Block Welding Sequence
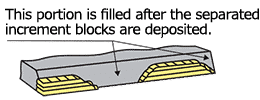
In a Block Welding Sequence, welding is carried out in a pre-planned sequence. They are deposited in blocks with steps with intermediate gaps that is filled after previous weld blocks are completed.
An example of a block sequence is shown in the below figure.
Buildup Welding Sequence
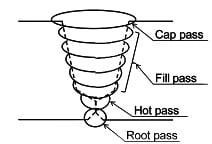
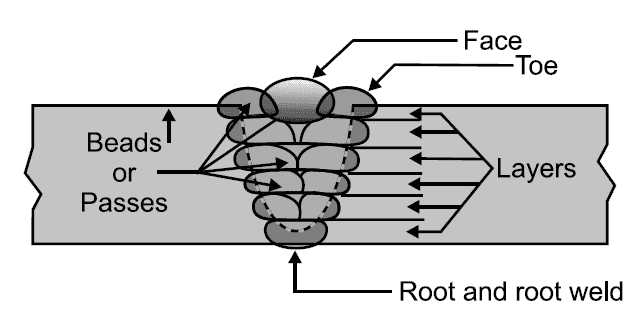
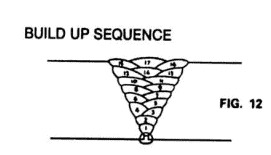
In a Weld Buildup sequence, weld beads or weld passes are welded to suit the base material or weld joint configuration. This is similar to a multipass weld deposit.
Cascade Welding Sequence:
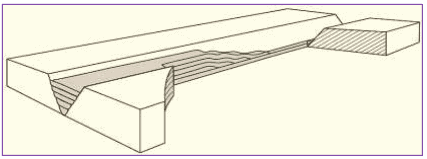
Cascade sequence is a combined longitudinal and buildup welding sequence by depositing the weld beads in overlapping layers. (In stick welding or SMAW, a backstep sequence is normally used when welding thick joints or performing tack welds that need to be incorporated in the weld.)
Deposition Welding Sequence:
The order in which the increments of weld metal are deposited. This is similar to the buildup sequence.
Wandering or Skip or Random Welding Sequence
A longitudinal welding sequence wherein the weld bead increments are deposited at random.
Whereas, in the Wandering Block welding Sequence, successive blocks of welds are deposited at random distance one by one.
Read more:
- Backstep Method | American Welding Society Education Online (aws.org)
- Weld Distortion (lincolnelectric.com)
- Welding Sequence (aws.org)
