How to Weld Repair Engine Block: Complete Guide
Welding an engine block can seem like a daunting task, but with the right welding process & and techniques, it can be accomplished with ease.
Welding an engine block involves repairing (e.g., crack or broken parts) or strengthening the metal casing that houses the engine’s cylinders, which is a critical component of the engine.
Before starting the welding process, it is essential to understand the materials and specifications of the engine block.
What materials engine blocks are made?
Engine blocks are typically made of cast iron, Cast Steel, aluminium and Magnesium, and the welding technique may differ depending on the material. It is crucial to note that welding cast iron requires a different approach than welding aluminum.
Engine blocks are the main structural component of an engine and are responsible for housing the cylinders, crankshaft, and other engine components.
The material used for engine blocks depends on various factors such as the intended application, engine size, and manufacturing techniques.
The most common materials used for engine blocks are:
Cast iron Material for Engine Block
Cast iron is a strong and durable material that can withstand high levels of compression and thermal stress. It is commonly used for high-performance and heavy-duty engines because of its strength and durability.
Aluminum Material for Engine Block
Aluminum is a lightweight material that is commonly used in modern engines. It has good thermal conductivity and is able to dissipate heat quickly, which helps to prevent overheating. Aluminum is also easier to machine than cast iron, which allows for more intricate designs.
Magnesium Material for Engine Block
Magnesium is a lightweight material that is often used in racing engines because of its high strength-to-weight ratio. It is also highly flammable, which makes it more difficult to work with.
Composite materials
Some high-performance engines use composite materials such as carbon fiber, which is lightweight and has high strength. However, composite materials are expensive and difficult to manufacture, which limits their use in mass-produced engines.
Should you repair cracked or damaged engine block?
The decision to repair a cracked or damaged engine block depends on the extent and location of the damage, as well as the cost and availability of replacement parts.
In general, minor cracks or damage that do not affect the structural integrity of the engine block can be repaired using various methods such as welding, brazing, or epoxy (E.g, JB Weld).
If the damage is extensive and affects the structural integrity of the engine block, then it is recommended to replace the block entirely. Attempting to repair a severely damaged engine block can result in safety risks and further damage to the engine, which can be costly to repair.
Additionally, it is important to consider the age and condition of the engine. If the engine is old or has high mileage, then it may not be cost-effective to repair or replace the engine block, as other parts of the engine may also require attention.
In summary, minor damage to an engine block can be repaired, but it is recommended to replace the engine block if the damage is severe or affects the structural integrity of the engine. It is also important to consider the age and condition of the engine before making a decision.
Which welding rod is best for engine block welding?
The choice of welding rod for engine block welding depends on the material of the block and the type of repair required.
Best Welding Rod for Cast Iron Engine Block
For cast iron engine blocks, nickel-based welding rods (Such as Nickel 55 & Nickel 99) are commonly used.
These rods have a high nickel content and are designed to provide a strong and durable weld that can withstand high temperatures and thermal stresses.

Nickel-based rods also have good machinability, which makes it easier to grind and shape the weld to match the contour of the engine block.
Best Welding Rod for Aluminum Engine Block
For aluminum engine blocks, a variety of welding methods can be used, including tungsten inert gas (TIG), metal inert gas (MIG), and gas tungsten arc welding (GTAW).
The choice of welding rod depends on the specific alloy used in the engine block. Typically, aluminum welding rods are made of an alloy that matches the composition of the engine block, which helps to ensure a strong and durable weld.
Most common Aluminum welding rods are ER4043 andER5356 types. These wire rods are available for both TIG Aluminum welding and MIG Aluminum Welding.
It is important to note that welding engine blocks should only be performed by experienced and qualified welders who have the necessary equipment and expertise to perform the repair safely and effectively.
Improper welding can result in further damage to the engine block and can compromise the safety of the vehicle.
Materials and Tools Required for Engine Block Repair?
To weld an engine block, you will need the following materials and tools:
- Welding Machine: TIG, MIG, or Stick welding machine
- Welding electrodes and filler metals
- Grinding and sanding tools
- Welding helmet and gloves
- Wire brush
- Heat-resistant gloves
- Engine block repair kit (if necessary)
Step-by-Step Guide on Welding an Engine Block:
Step 1: Preparing the Engine Block
Before welding the engine block, it is essential to clean the area to be welded thoroughly.
The engine block should be stripped down to its bare metal, and all dirt, oil, and debris should be removed. The area to be welded should be sanded and cleaned using a wire brush.
Step 2: Determine the Type of Welding to Use
The type of welding used will depend on the type of engine block material. Cast iron engine blocks require a preheat temperature of around 500°F, while aluminum engine blocks require a preheat temperature of around 300°F.
Welding aluminum requires a TIG welding machine with an AC current, while MIG welding can be used for cast iron.
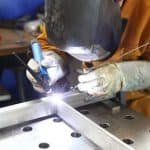
Step 3: Welding the Engine Block
Once the engine block is cleaned and preheated, it is time to start welding. The welder should ensure they have the proper welding electrode and filler metal for the engine block material. The welder should also wear protective gear such as a welding helmet and gloves.

Step 4: Post-Welding Process
After the welding process is complete, the engine block should be allowed to cool down to room temperature. The welder should then use a grinding tool to smooth out any rough areas or unevenness on the surface of the engine block.
Step 5: Inspect the Weld
After grinding, the weld should be inspected to ensure there are no cracks or defects. If any defects are found, the welder should re-weld the area or use an engine block repair kit.
Cast iron engine block repair by welding and epoxy putty
Cast iron engine blocks can be repaired using welding or epoxy putty, but the method of repair depends on the extent and location of the damage.
Welding is a common method used for repairing cast iron engine blocks. It involves using a welding rod with a high nickel content to fuse the damaged area back together.
The welding process can be challenging, as cast iron is prone to cracking and requires a slow cooling process to prevent further damage. It is important to note that welding should only be performed by a qualified and experienced welder.
Epoxy putty can also be used to repair minor cracks or holes in cast iron engine blocks. The putty is a two-part adhesive that is mixed together and applied to the damaged area.
It hardens over time and creates a strong bond that can withstand high temperatures and pressure. Epoxy putty can be a good temporary solution for small cracks, but it is not recommended for more significant damage.
It is important to note that both welding and epoxy putty are temporary solutions and may not provide a long-term fix for a damaged engine block.
A damaged engine block can compromise the safety and reliability of the vehicle and should be addressed as soon as possible. In some cases, it may be more cost-effective to replace the engine block entirely rather than attempting to repair it.
How to repair crack in an engine block casing?
Repairing a crack in an engine block casing can be a challenging task and should only be attempted by experienced and qualified mechanics. The method of repair depends on the size and location of the crack, as well as the material of the engine block casing.

Here are some general steps that may be followed to repair a crack in an engine block casing:
- Identify the location and extent of the crack: This will help determine the best method of repair and the materials needed for the job.
- Clean the area around the crack: Use a degreaser or solvent to remove any oil, grease, or dirt from the surface around the crack. This will ensure that the repair material adheres properly.
- Drill a small hole at the end of the crack to arrest the crack: This will help prevent the crack from spreading further.
- Repair the crack using a suitable material: The material used for repair depends on the size and location of the crack, as well as the material of the engine block casing. For example, epoxy putty or welding may be used for small cracks, while more extensive damage may require the replacement of the casing or a more extensive repair process.
- Allow the repair material to dry and cure: Follow the manufacturer’s instructions for the drying and curing time of the repair material.
- Reinstall the engine block casing: Once the repair has been completed, reinstall the engine block casing and test the engine to ensure that there are no leaks or other issues.
Inspection after welding repair of engine block
After repairing an engine block by welding, it is important to perform a thorough inspection to ensure that the repair has been successful and the engine is safe to operate. Here are some steps that can be followed during the inspection:
- Visual inspection: Inspect the welded area for any signs of cracking, discoloration, or other defects. Look for any signs of warping or distortion that may have occurred during the welding process.
- Pressure test: Perform a pressure test on the engine block to check for any leaks or weaknesses in the welds. This test involves applying pressure to the cooling system of the engine block and checking for any leaks or loss of pressure.
- Machining: After welding, the surface of the engine block may need to be machined to ensure that it is flat and even. Check that the machined surface is within the manufacturer’s specifications.
- Final assembly: Once the inspection is complete, reassemble the engine and run it for a short period to ensure that it is operating smoothly and there are no signs of leaks or other issues.
It is important to note that repairing an engine block by welding is a complex process that should only be performed by qualified and experienced professionals.
If you are not confident in your ability to perform the repair or the inspection, it is recommended to seek the assistance of a qualified mechanic or engine specialist.
Additionally, regular maintenance and inspections of the engine block can help prevent the need for repairs and prolong the life of the engine.
Material Welding is run by highly experienced welding engineers, welding trainers & ASNT NDT Level III bloggers.
We strive to provide most accurate and practical knowledge in welding, metallurgy, NDT and Engineering domains.