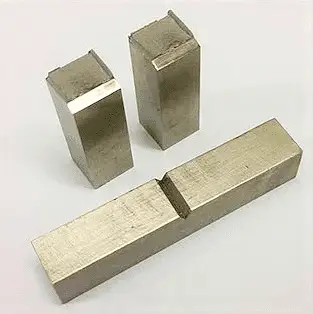
The tensile test procedure involves attaching the sample to the testing machine and applying force until the material fractures. The results are typically recorded in a stress-strain diagram.
The most important parameters measured in the test are the ultimate tensile strength, yield strength, and elongation at break.
What is the TENSILE TESTING or TENSILE TEST?
Tensile testing or Tensile Test is also known as Tension Test is a Destructive Test method and the most common type of mechanical test.
A tensile test is used to determine the yield point or yield strength, tensile strength or ultimate tensile stress, and percentage elongation of a metal.
The tensile Testing method measures the force required to break a metallic, composite, or plastic specimen and the extent to which the specimen stretches or elongates to that breaking point.
Tensile Test Procedure
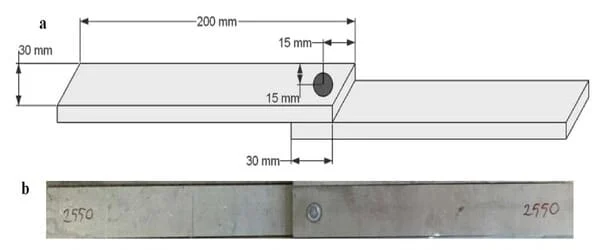
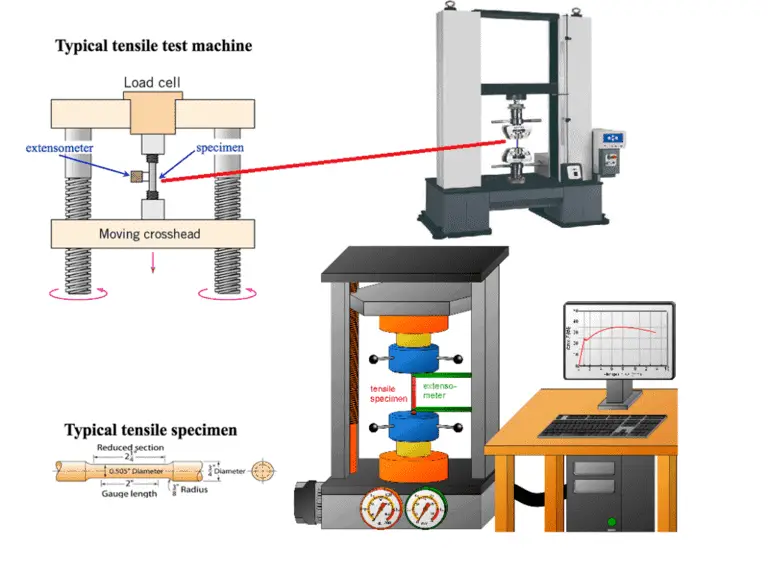
A tensile specimen of standard dimensions machined from the metal is inserted in a tensile testing machine (shown in the below figure).
The machine consists essentially of two parts: the straining or pulling device and an arrangement to measure and register the load on a dial. A gradually increasing tensile load is applied to the specimen and the resultant extension (or strain) of the specimen is observed.
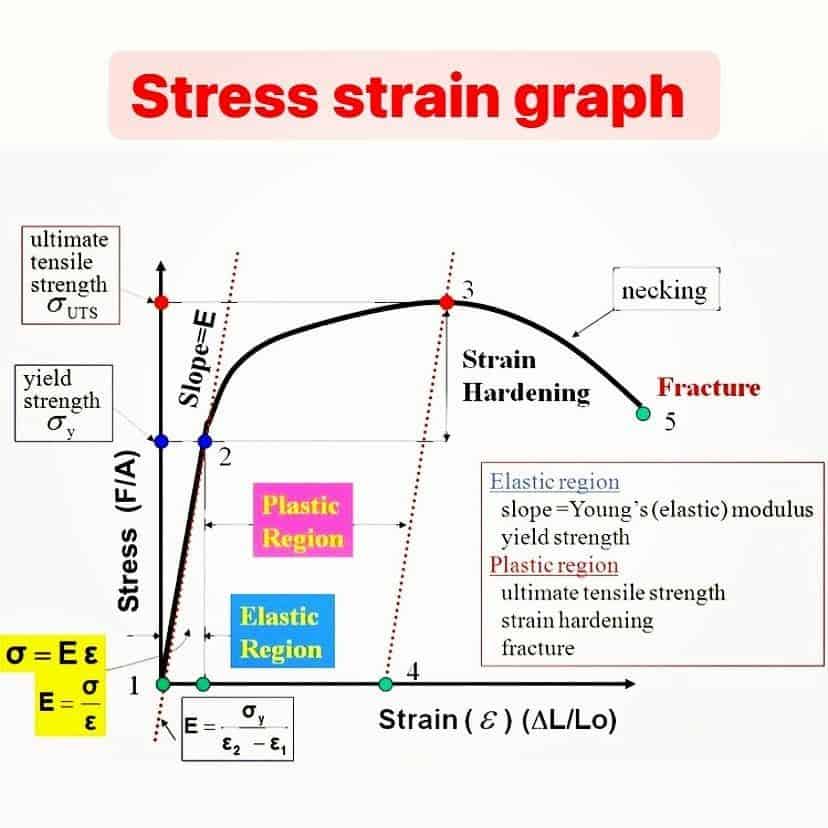
The relation between applied stress (i.e. load divided by cross-section) and extension or elongation is indicated by a stress-strain curve such as the one shown in the below figure, which is typical of ductile carbon steel.
Up to point P on the curve, the stress is proportional to the strain as indicated by a straight line. It is termed the limit of proportionality.
Beyond P, the curve deviates from the straight line. Point E on the curve is the elastic limit. This means that up to this point the specimen returns to its original dimensions when the load is removed and thus exhibits elasticity.
As the load is increased beyond the elastic limit, there comes a point at which there is a sudden extension, indicated by the drop of the beam and continued extension with a lower load.
If the load is removed, the specimen does not recover its original dimensions and it is said to have undergone plastic deformation or plastic flow.
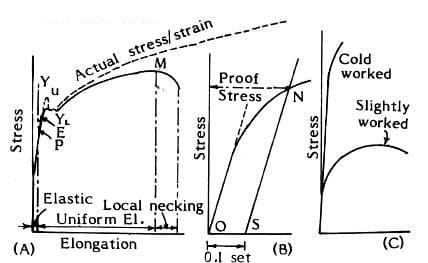
In the curve above, the upper yield point is denoted by Yu, the highest stress before sudden extension takes place, and its value is affected by surface finish, the shape of test piece, and rate of loading.
The lower yield point, which is normally measured in commercial testing, is denoted by YL, the lowest stress producing the most elongation. Such large elongation of the metal occurs in very few materials, such as wrought iron and mild steel.
As the load is increased, the specimen continues to extend (i.e. plastic deformation) until a constriction occurs in the gauge length and the beam drops.
This corresponds to the maximum load (point M on the curve) on the specimen. The load now acts on a diminishing area and produces stress sufficient to break the specimen.
This maximum stress ‘M’ is the tensile strength of the metal. The actual breaking stress which is lower than the stress at M is never used in practice.
Tensile Test Specimens Dimensions
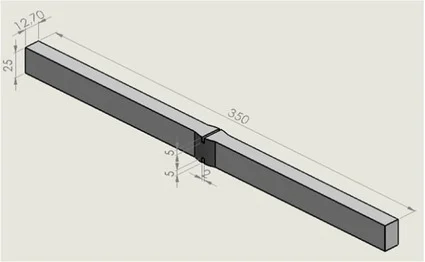
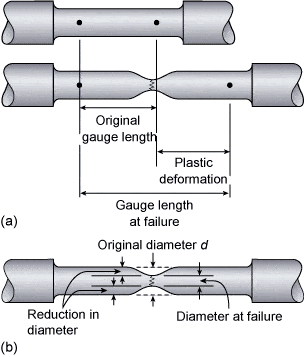
In the tensile specimen, gauge length and parallel length are standard dimensions. These are shown in the Figure below.
Gauge length which is usually 50 mm is marked by two points on the specimen before testing, and the final gauge length after fracture is measured.
Tensile Testing Experiment
The purpose of the Tensile Test is to determine one or more strength (e.g tensile strength & Yield strength) and deformation (percentage elongation or reduction in area) properties in compliance with certain conditions (e.g. room temperature or elevated temperature) as specified in the test standards or code.
Here, a tensile test coupon is generally loaded to the breaking point and the required tensile force is recorded.
Since the tensile test has a special significance in the assessment of base materials and in the examination of welded joints, the experimental conditions must be defined as precisely as possible, so that different testing lab always reports clean and comparable results.
Tensile Test Calculations
During the test, the value of applied load (F) & change in total length ((∆L) of the test specimen is measured continuously.
The value of stress (force/ unit area, denoted by σ) either Yield Stress or Tensile Stress, and the strain (percentage elongation, denoted by ε) is obtained by the tensile test result.
The cross-sectional area (at the center of the test specimen) of the test specimen is required to calculate the value of stress or tensile strength.
Tensile Strength formula & calculation
Tensile test based on the tensile test data is calculated by using the below formula:
Stress (σ) = Force (F) / cross-sectional Area of the test specimen (A)
Where Force in Newton & Area in mm2 or inch2.
Similarly, the value of strain (ε) is calculated by dividing the change in length (∆L) by the original length (L) of the test specimen.
The Strain is also called by another name either percentage elongation or percentage reduction.
Percentage elongation/ percentage reduction in area Formula
Percentage elongation is a measure of the ductility of the metal and indicates the safety factor when it is stressed in service. Ductility may be defined as the property which enables metals to be drawn into wire using a tensile force.
Percentage reduction of area is another measure of ductility which can be measured in a tensile test. It is obtained by carefully fitting together the ends of the fractured tensile specimen and measuring the dimensions of the smallest cross-section.
The difference between this area and the original cross-sectional area, divided by the original cross-sectional area and multiplied by 100 gives the percentage reduction of area.
Strain or percentage elongation or percentage reduction in area can be calculated by the below formula:
strain (ε) = (∆L-L)/∆L*100
Where,
- ∆L is the final gauge length,
- L is the initial gauge length
The percentage elongation or elongation after fracture in a tensile test is the remaining length variation (∆L-L) referred to as the initial measuring length (L) after a fracture.
Similarly, reduction of area, Z is the largest remaining cross-section change referred to the initial section after fracture of the test specimen.
Example of Percentage (%) Elongation Calculation
If the original gauge length of 50 mm (L1) has increased to 60 mm ( L2) at the end of the test, the percentage elongation is calculated as follows:
(L1–L2)/L1 *100 = 60-50/50*100 = 20%
So, the Percentage Elongation will be 20%.
Tensile Testing Standards & Specification
The main tensile testing standards and specifications are listed below. These standards are applicable for material and weld joint testing.
- ASTM E8/E8M – Tensile Testing of Metallic Materials
- BS EN ISO 4136: Destructive tests on welds in metallic materials. Transverse tensile test
- BS EN 895: Destructive tests on welds in metallic materials. Transverse tensile test
- ISO 6892 – Tensile Testing of Metallic Materials
- ASTM D412 – Tensile Testing of Elastomers
- ISO 37 – Tensile Testing of Elastomers
- ASTM D638 – Tensile Testing of Plastics
- ISO 527-2 – Tensile Testing of Plastics
- ASTM A370 – Standard Test Methods and Definitions for Mechanical Testing of Steel Products
Importance of Tensile Test
Tensile testing is the most important mechanical test that is essential for all mechanical design & construction.
The test provides important data for material selection, evaluation, and quality assurance. The test helps to give critical input for material integrity assurance that it will meet the minimum required tensile/ yield strength and elongation for the product life.
All critical engineering design such as bridges, railroad, aerospace, and machinery where human life can be at risk, relies on the reliability of the data obtained by the tensile test.
In these applications, tensile test roles are highly important. A wrong result or not complying with the design standards can put both financial and human life at risk.
The financial expense of such fatal incidents caused due to substandard material selection is much higher than the cost of performing the usual tensile testing of the materials.
Which are the types of Tensile tests?
The tensile tests can be classified in the following types based on the purposes as listed below:
- Under continually increasing (smooth) load—Classic quasi-static tensile test
- Under constant resting (static) load—Static tensile test
- Under alternating load for determination of the cyclic stress strain curve—LCF (low cycle fatigue)
- At room temperature (10 to 35 °C): Standard Tensile Test
- At elevated temperatures (too far over 1000 °C): Elevated Temperature Tensile Test or Hot Tensile Test
- At low temperatures or Cryogenic temperature Tensile Test (down to -269 °C)
- At very low test speeds—Creep tests
- At elevated test speeds—High-speed tensile test.
Which Properties do we get from a Tensile test?
Tensile testing gives information about various mechanical properties for a given material. The basic tensile test is performed to know about Yield strength, tensile strength & elongation.
The most important of them are listed here:
- Tensile strength
- Yield strength
- Percentage elongation (Strain)
- Percentage reduction in area (Strain)
- Load at failure
- Young modulus
- Maximum load
Stress-Strain Curve
Stress-strain tensile curves highlight the material’s deformation in reply to tensile loading, or compressive loading, or torsional applications.
Based on material type for testing (Either brittle or ductile for example), a stress-strain curve also can provide main material properties.
A stress-strain graph tells us many important mechanical properties for example- tensile & Yield strength, elasticity, yield point, and percentage elongation & reduction in area during loading the tensile test coupon.
These properties are of the utmost value for many engineering applications having a successful & reliable design.
A typical stress-strain curve with various attached points is shown in the below figure.
Brittle & Ductile fracture in Tensile Test
In engineering materials, the material fracture takes place by the following types:
- Brittle fracture, (Cohesion or cleavage fracture)
- Ductile fracture
- A mix of brittle & ductile fracture
In a brittle fracture, the fracture of material lacks any major plastic deformation, and hence the tensile specimen after fracture shows a flat surface without any necking in the fracture area.
A brittle fracture occurs in both transgranular and intergranular. It is mainly observed in body-centered cubic (BCC) materials as they lose their ability to slide ( lose ductility and plasticity) at an atomic level as the temperature drops.
The conditions for this fracture mechanism exist when the highest normal tensile stress of the material is exceeded. Hence, brittle fractures are normal stress fractures.
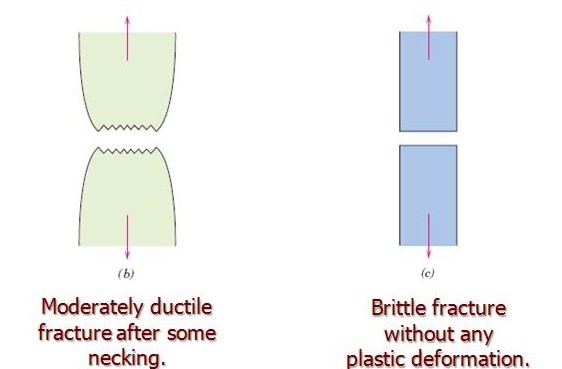
On the other hand, the ductile fracture exhibits significant plastic deformation as a necking in the fracture area. Here, the material behaves plastically and is therefore ductile.
In terms of material atomic structure, the ductile fracture can occur in BCC (Body-centered cubic), HCP (hexagonal closed packing), and FCC (face-centered cubic).
Except FCC, BCC & HCP are temperature dependent. Usually, in BCC & HCP materials as the temperature drops, they start showing brittle fractures.
There is a significant drop in this phenomenon at subzero temperatures. Therefore, it is a significant factor when designing parts for low temperature and toughness properties (Impact load).
