Welding is a versatile skill that opens up a world of possibilities for fabricators and DIY enthusiasts alike. One common welding technique is welding corner joints, which allows for the joining of two metal pieces at a right angle.
In this blog post, we will guide you through the process of welding corner joints, providing you with valuable tips and insights along the way.
Step 1: Preparing the materials and workspace
Before starting the welding process, gather all the necessary materials and ensure you have a clean and organized workspace. You’ll need safety equipment like a welding helmet, gloves, and protective clothing. Additionally, make sure you have the appropriate welding machine, electrode, and metal pieces for the corner joint.
Step 2: Choosing the right welding method
There are various welding methods available for corner joints, such as stick welding, MIG welding, or TIG welding. Consider the type of metal you’re working with, the thickness of the material, and the desired strength of the weld when selecting the appropriate welding method.
Step 3: Cleaning and preparing the joint
Properly cleaning and preparing the joint is essential for a strong weld. Remove any dirt, rust, or paint from the metal surfaces to be welded using a wire brush or grinder. Ensure that the joint fits tightly and is properly aligned before proceeding.
Step 4: Welding the corner joint
Begin by tack welding the corners to hold the joint in place. Tack welds are small, intermittent welds that act as temporary fasteners. Once the joint is secured, start welding from the base, working your way up.
Maintain a consistent travel speed and angle to achieve a uniform weld bead. Pay attention to the weld puddle, ensuring it has good penetration without excessive heat buildup.
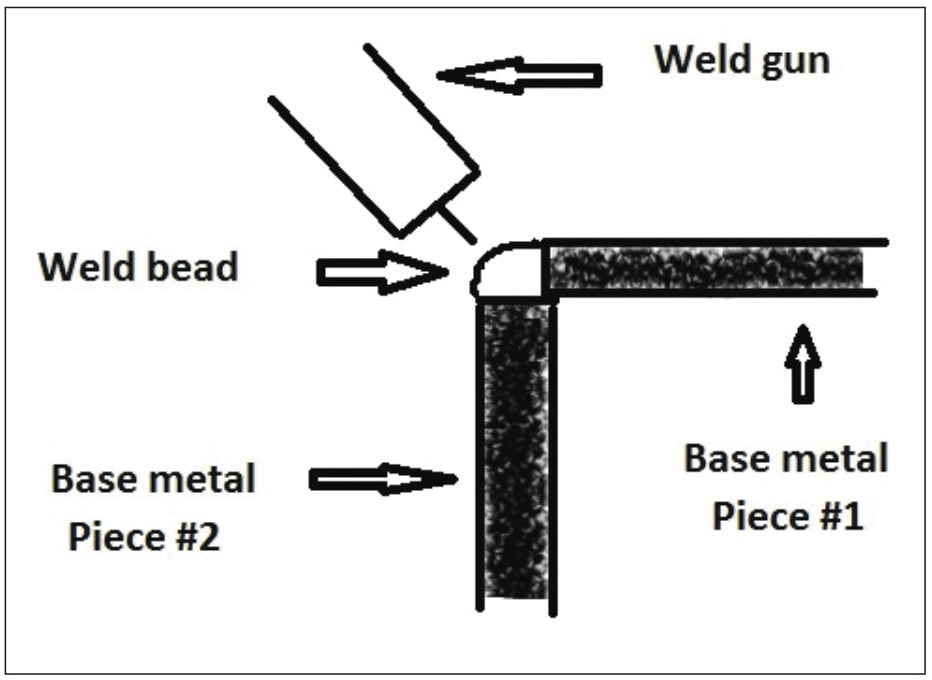
Welding Outside Corner Joint
The outside corner joint, whether with or without filler metal, is a simple type of welded joint. It is relatively easy to create this joint, especially when the sheets are properly tacked together. In some cases, there may be no need to add filler metal. However, if filler metal is used, it should be added consistently and evenly, similar to the application of stringer beads.
Step 5: Inspecting and finishing the weld
After completing the welding process, allow the weld to cool naturally. Once cooled, inspect the weld for any defects such as cracks, porosity, or lack of fusion. Use appropriate tools like a wire brush or grinder to clean up the weld and remove any slag or spatter. This will give the weld a clean and finished appearance.
Conclusion: Tips for successfully welding corner joints
Proper preparation is crucial, so ensure the joint is clean and properly aligned.
Choose the appropriate welding method based on the type and thickness of the metal.
Practice tack welding to hold the joint in place before proceeding with the full weld.
Maintain a consistent travel speed and angle during the welding process.
Inspect the weld for defects and clean up the weld to achieve a professional finish.


")


