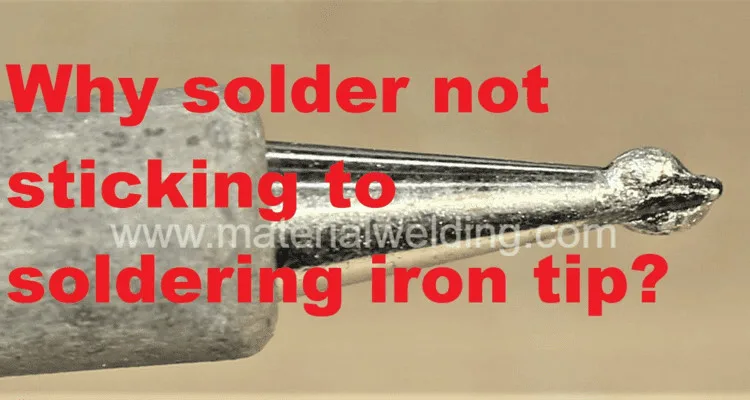
In this article, we will discuss the reasons Why solder not sticking to soldering iron tip and how to fix it.
Solder not sticking to the soldering iron tip can be an annoying issue, but there are ways to fix it.
The first step towards finding a solution is identifying what might be causing the issue. This could be due to oxidation of the tip, low temperatures, or inadequate cleaning of parts before soldering.
This article outlines some troubleshooting steps that you can use to identify and solve this problem. We’ll discuss how temperature, flux, surface preparation and other factors can affect the soldering process.
Reasons: Why solder not sticking to soldering iron tip:
Soldering is an essential skill for electronic technicians, DIY enthusiasts, and professionals.
It involves melting a metal alloy, known as Solder, to join two metal surfaces.
Achieving successful solder connections is dependent on the soldering iron tip making good contact with the solder.
When the solder does not stick to the soldering iron tip, it can be difficult or impossible to create a successful joint. There are several reasons why solder may not be sticking to the soldering iron tip.
Oxidation of Soldering Iron Tip
Soldering iron tips are made of copper, which reacts with oxygen in the air to form copper oxide.
Copper oxide does not conduct heat well, making it difficult for the tip to transfer heat to the solder. This results in a poor joint, and the solder does not stick to the tip.
Oxidation occurs when heat and moisture interact with the metal of the tip, causing it to degrade and corrode.
Related reading: Types of Soldering Flux
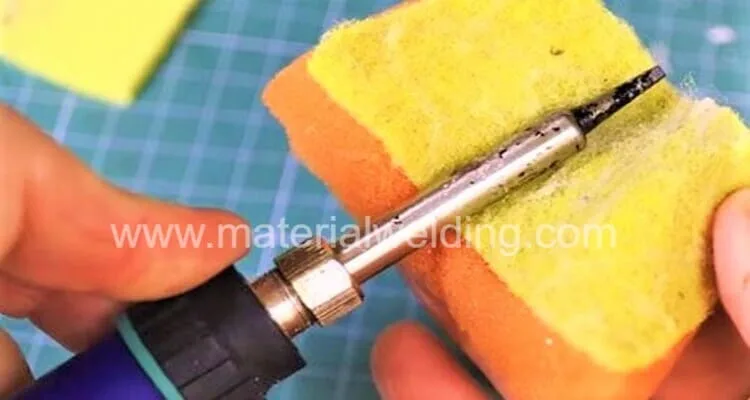
To start, make sure you regularly clean your soldering iron tip with a damp sponge or cloth. This will help remove any build-up on the surface of the tip and keep oxidation at bay for longer periods of time.
Additionally, investing in a high-quality soldering station or stand will also help protect your tips from excessive heat and moisture that can lead to oxidation.
Dirty tip
If the soldering iron tip is dirty, it will not transfer heat efficiently, leading to a weak joint. Dirt and debris can also prevent solder from sticking to the tip.
An essential part of using a soldering iron is ensuring that its tip stays clean and free of oxidation or residue build up.
If left unchecked, a dirty tip can cause ineffective soldering as well as damage to the components being worked on.
Make sure your soldering tip is always tinned before use. This will help prevent oxidation and also provide an easier surface for solder to stick to during operation.
Additionally, it’s important to regularly clean the soldering tip with a brass sponge or wet sponge dipped in flux remover solution after each use.
Wrong temperature
Soldering requires a specific temperature range to melt the solder and create a strong joint.
If the temperature is too low, the solder will not melt, and if it is too high, it can damage the component being soldered. If the temperature is not correct, solder will not stick to the tip.
It might surprise some people to learn that soldering at the wrong temperature can lead to serious problems, from useless solder joints to electronic components being damaged beyond repair.
Knowing the correct temperature for soldering is therefore key for any professional or amateur looking to do a good job.
Below table gives recommended temperature range for different solder types.
| Solder type | Recommended temperature range |
| Lead-free solder | 370-400°C (700-750°F) |
| Tin-lead solder | 260-315°C (500-600°F) |
| Silver solder | 650-815°C (1200-1500°F) |
| Aluminum solder | 380-430°C (720-800°F) |
Related Reading: How Strong is Silver Solder
Tip shape
The shape of the tip can affect how well it transfers heat to the solder. A tip that is too small will not transfer enough heat, while a tip that is too large can damage the component being soldered.
| Tip shape | Uses |
| Conical tip | General-purpose tip used for small components and through-hole soldering |
| Chisel tip | Used for larger components and surface mount soldering |
| Bevel tip | Used for precision work and soldering in tight spaces |
| Hoof tip | Used for soldering large joints and thick wires |
| Needle tip | Used for delicate work and soldering small components |
Soldering iron tip coating
Some soldering iron tips have a coating, such as nickel or chrome, to protect against oxidation.
If this coating is damaged or worn off, the tip will not transfer heat well, leading to poor solder joints.
Solder not sticking to wire: Main reasons
Sometimes, solder does not stick to the wire, making it difficult to create a strong joint. The most common reason for this is a dirty or corroded wire.
It is essential to clean the wire thoroughly before attempting to solder it. Sandpaper or a wire brush can be used to remove any corrosion or dirt. If the wire is not clean, the solder will not stick to it, resulting in a weak joint.
How to get solder to stick to metal?
To get solder to stick to metal, follow these steps:
- Clean the metal surface thoroughly using sandpaper or a wire brush. This will remove any dirt, corrosion, or oxidation that can prevent the solder from sticking.
- Apply flux to the metal surface. Flux is a chemical that removes oxidation and helps the solder flow onto the metal surface. Apply a small amount of flux to the metal surface using a flux pen or brush.
- Heat the metal surface with the soldering iron. The heat will activate the flux and melt the solder. Make sure the soldering iron is at the correct temperature for the solder being used.
- Apply the solder to the metal surface. Touch the solder wire to the heated metal surface, and it should flow onto the metal and create a strong joint.
Types of Flux for Soldering
Soldering is an important skill to have, and flux plays a large role in it. Flux helps the solder flow more easily onto the metal surface and prevents oxidation.
There are various types of flux designed for different soldering applications as listed in the below table.
| Flux type | Uses |
| Rosin flux | Used for general-purpose soldering |
| Water-soluble flux | Used for electronic assembly and cleaning |
| No-clean flux | Used for fine-pitch components and high-temperature soldering |
| Acid flux | Used for plumbing and heavy-duty soldering |
Note: Acid flux should not be used for electronic components as it can damage them.
Conclusion
Soldering is a crucial skill that requires precision and knowledge. Solder not sticking to the soldering iron tip can be frustrating, but with the right technique and equipment, it can be easily fixed.
Related reading: What is Soldering?
The best solution for those cases where the solder does not stick to the tip is temperature control.
Do not allow overheating of the soldering iron. Timely cleaning and proper execution of all preliminary work will help you never wonder why soldering iron does not stick to the tip of the soldering iron.
Remember to clean the soldering iron tip, adjust the temperature, use the correct tip shape, and apply flux to the metal surface. With these tips, you’ll be able to create strong solder joints and complete your projects with confidence.


